Pectoral Girdle & Upper Extremities
Directions
- Print this PDF worksheet for a hardcopy guide as you work through this lesson.
- Within the lesson click the red linked headings to bring up the desired starting point within the cadaver for your work.
- Use the provided images on the worksheet to annotate and identify specific anatomical structures.
Depending on who you are listening to, the pectoral girdle may be referred to as a singular structure or as plural, right and left. The difference is purely semantic. Identify the following parts of the pectoral girdle. Rotate your specimen so you can clearly see the anterior and posterior relationships between these bones.
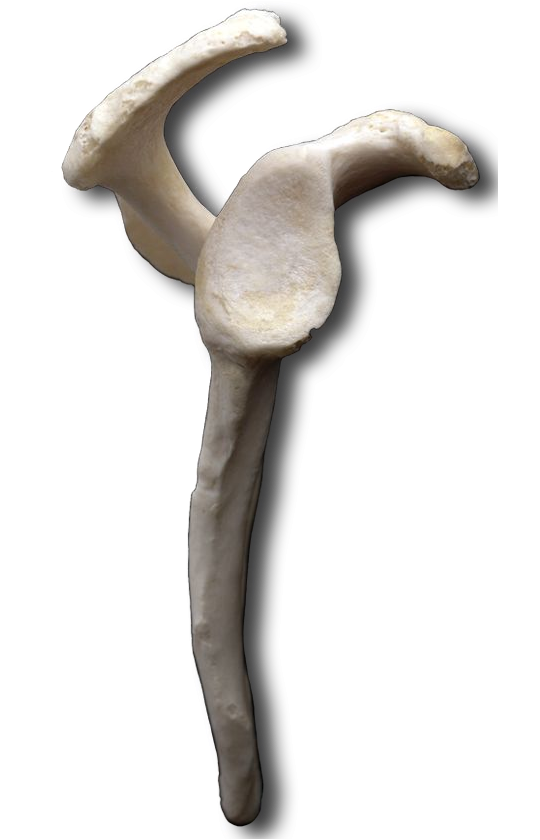
- clavicle (right & left) - Commonly called the "collar bone", the clavicle articulates with the manubrium of the sternum at the sternoclavicular joint. It articulates with the scapula at the acromioclavicular joint. The clavicle helps hold the scapula and arm in position but also allows the scapula to move, which increases shoulder mobility.
- scapula (right & left) - Commonly called the "shoulder blade" the scapula articulates with the humerus (arm bone) at the glenohumeral joint. The scapula is mobile because its only bony attachment to the trunk is the clavicle.
Because the clavicles transmit force from the upper limbs to the trunk, they are among the most frequently broken bones in the body. The outward curve of the bones is the weakest point, so these fractures tend to be outward thereby protecting underlying nerves and blood vessels. This is certainly not the case with compression fractures of the bone caused, for instance, by automobile accidents when wearing a shoulder harness. Of course, a broken collarbone is vastly preferable to the cranial and vertebral damage done by impacting the windshield!
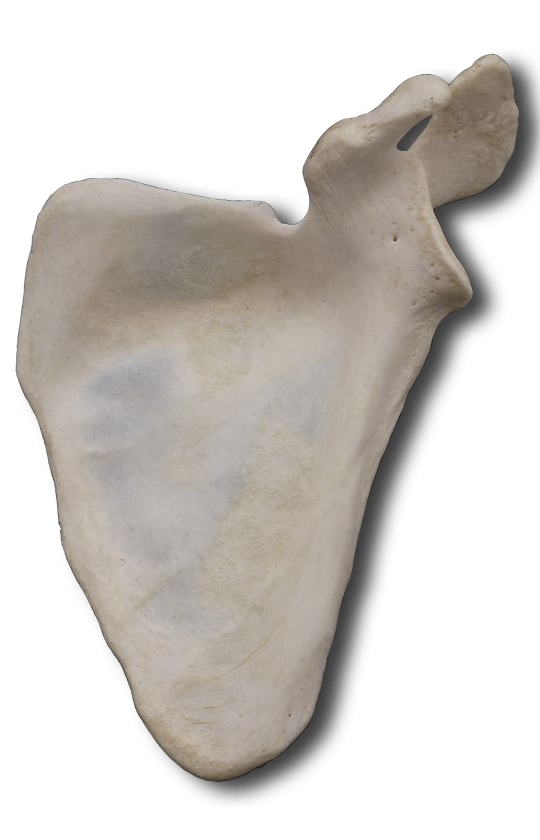
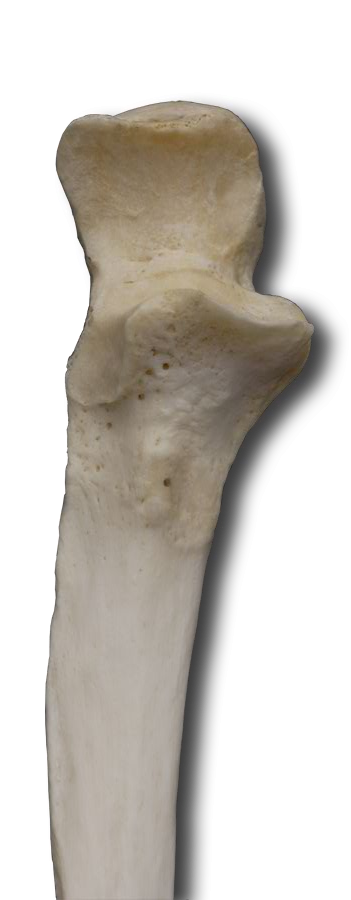
Let's take a detailed look at the scapula. Your specimen does not label these landmarks so you will need to use the photograph below to investigate them and identify them on your specimen.
- spine - Locate the sharp ridge that rises from the posterior aspect of each scapula. The lateral end of the spine projects as a flattened and expanded process called the acromion that is easily palpated (felt) as the high point of the shoulder. As always, rotate your specimen for the best perspective (posterior is the best perspective for the spine). The acromion articulates with the acromial end of the clavicle to form the acromioclavicular joint. The clavicle is in place so you can see this articulation. Dissect away the clavicle once this identification is made.
- glenoid cavity - This shallow depression accepts the head of the humerus (arm bone) to form the glenohumeral joint.
- subscapular fossa - This anterior depression is where proximal shoulder muscle tendons attach.
- inferior angle - The lateral and medial borders meet at the bottom of the scapula to form the inferior angle.
- superior angle - This is where the superior border meets the medial (vertebral) border to form the upper "point" of the scapula.
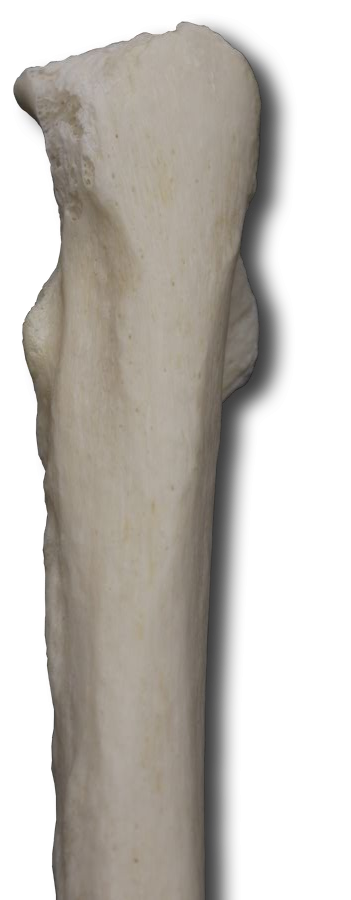
Rotate your specimen 180° to examine the posterior aspect of the scapula. Now that you know where these bones are located, fade out the external anatomy (skin). This improves the resolution of the bones for easier identification of the markings. Additionally, you may want to examine only one scapula for detail and dissect away the other.
- supraspinous & infraspinous fossa - "Supraman" flies over the city. The supraspinous fossa is the scapular depression over the spine. The infraspinous fossa is inferior to the scapular spine. Again, these depressions are attachment surfaces for proximal tendons of shoulder muscles.
Rotate specimen for lateral view. This is the best perspective to see the glenoid cavity.
- coracoid process - This projection from the anterior surface is where muscle tendons attach. "Coracoid" means "like a crow's beak."
1 + 2 + 8 + 5 + 14 = 30 Let's figure out what that means!
Anatomically, the upper limb consists of the arm, forearm, wrist, and hand. I bet you thought the whole thing was the arm, eh? Now you know, just the "upper arm" is technically referred to with that name.
Identify the following:
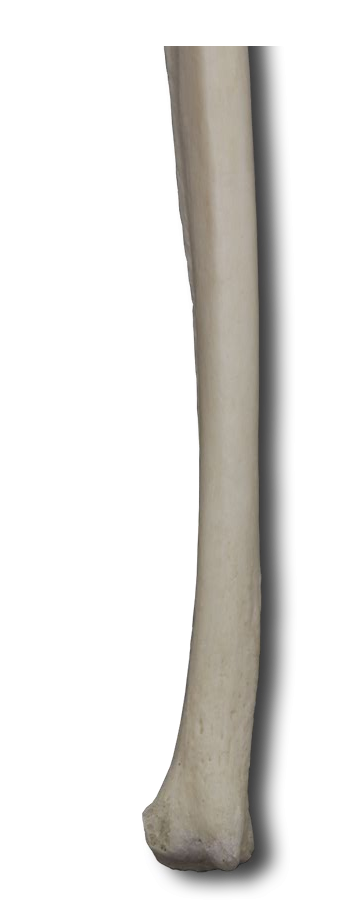
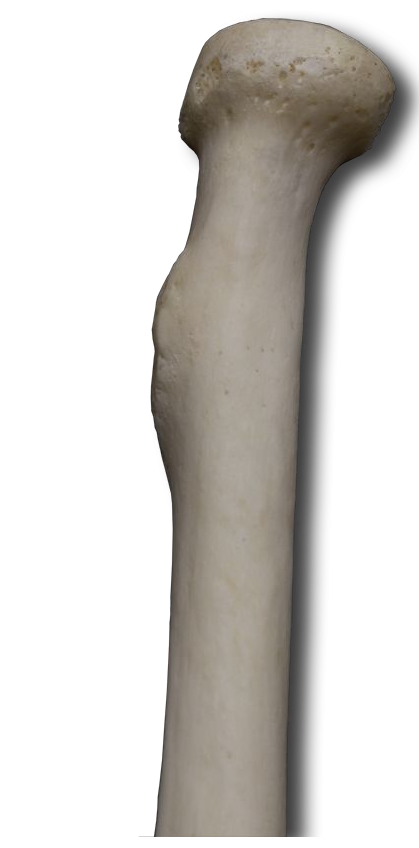
- humerus - Arm bone
- radius - This is the forearm bone on the thumb side. It "radiates" around as you rotate your forearm.
- ulna - forearm bone on the little finger side
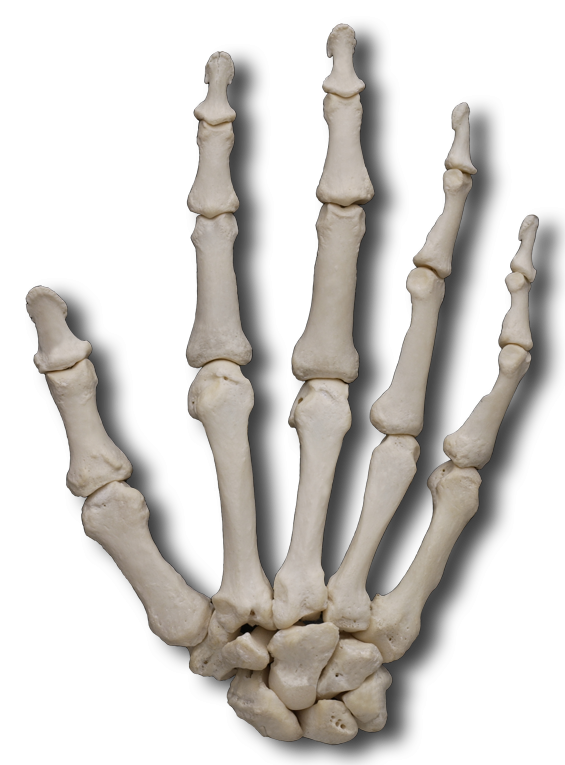
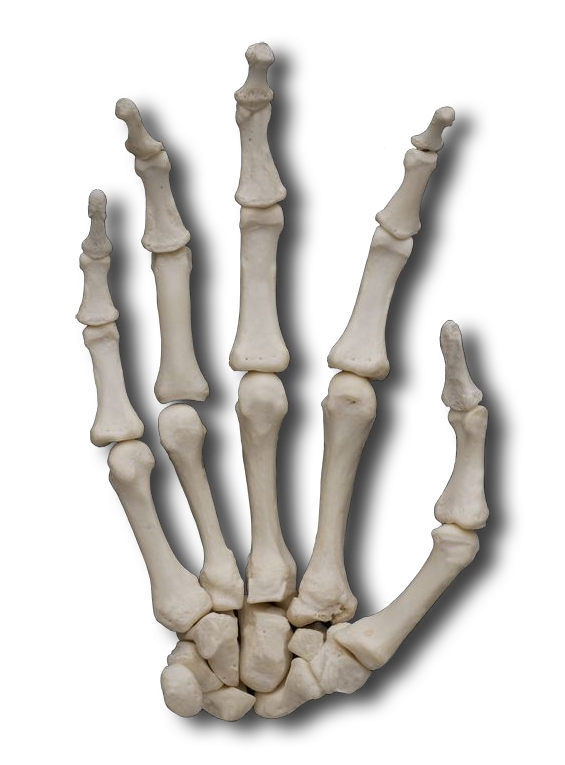
- carpals - scaphoid, trapezium, trapezoid, lunate traquetrum, pisiform, capitate, hamate (Don't worry about individual bones at this point, just call them all "carpals" and we'll study them individually later in the dissection.)
- metacarpals - These form the palm and back of your hand.
- phalanges - Finger bones
Using the interactive image as a guide, identify the following in your specimen. Rotate your specimen for the best perspective, BUT, realize that it moves on the screen as a result of "flipping" him over. Consequently, you'll need to reposition him back into your window. You can use the zoom slider on the left to help, too.
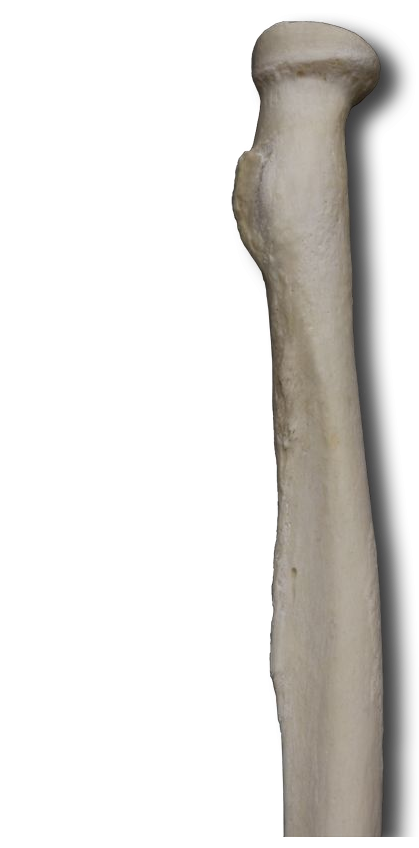
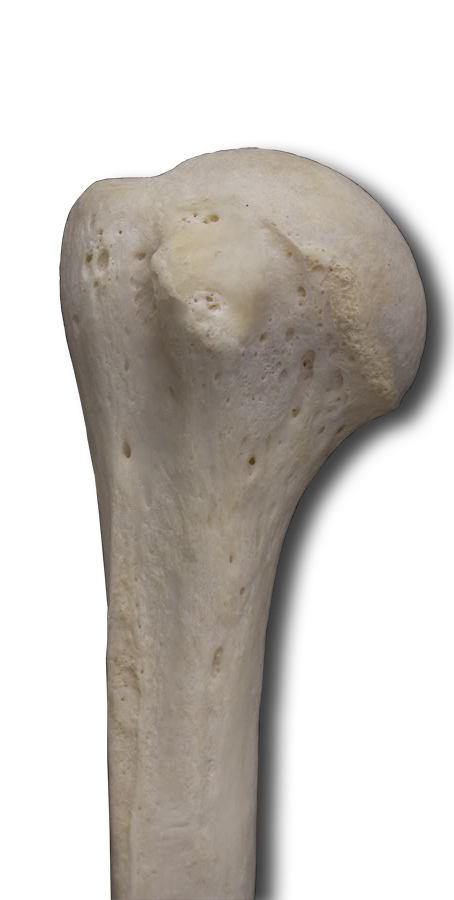
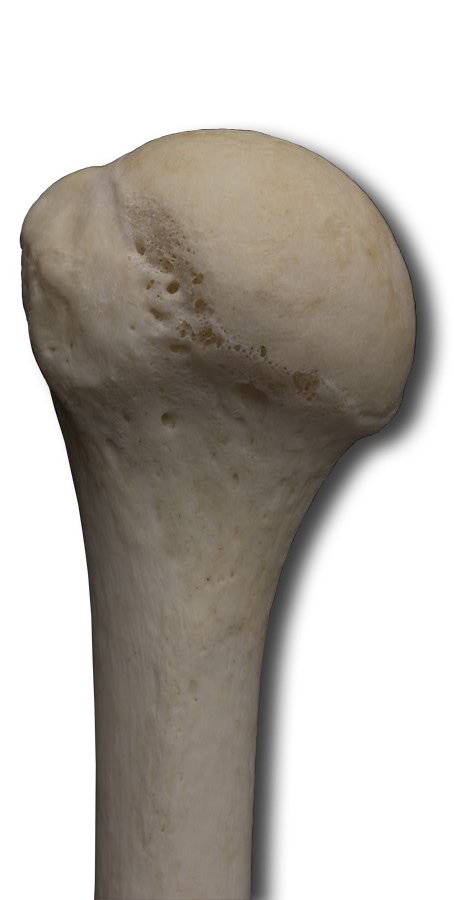
- head - the proximal end of the humerus that articulates with the scapular glenoid cavity forming the glenohumeral joint that allows a wide range of movements of the upper limb
- anatomical neck - Located distal to the head, this is the site of the epiphyseal line.
- greater & lesser tubercles - These "bumps" are the attachment points for arm moving muscles. Note the lesser tubercle is anterior and the greater tubercle is lateral.
- intertubercular sulcus (groove) - the furrow between the two tubercles through which a muscle tendon passes
- surgical neck - The constriction just distal to the tubercles, where the head tapers to the shaft, is so named because this is where humerus fractures most commonly occur.
- shaft - This is the cylindrical to triangular medial portion of the humerus and is the weight bearing portion AND provides attachment sites for arm and forearm moving muscles.
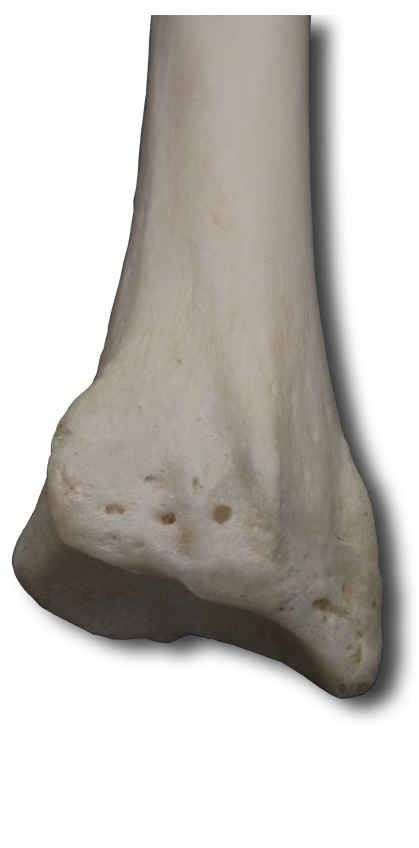
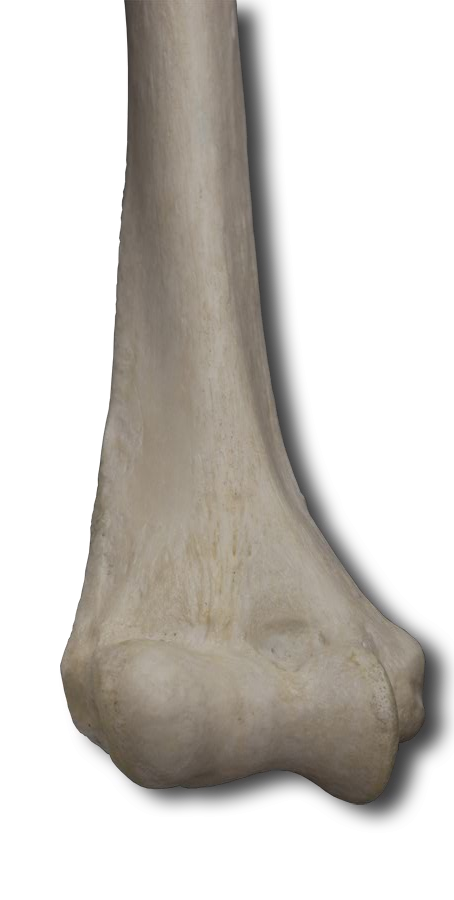
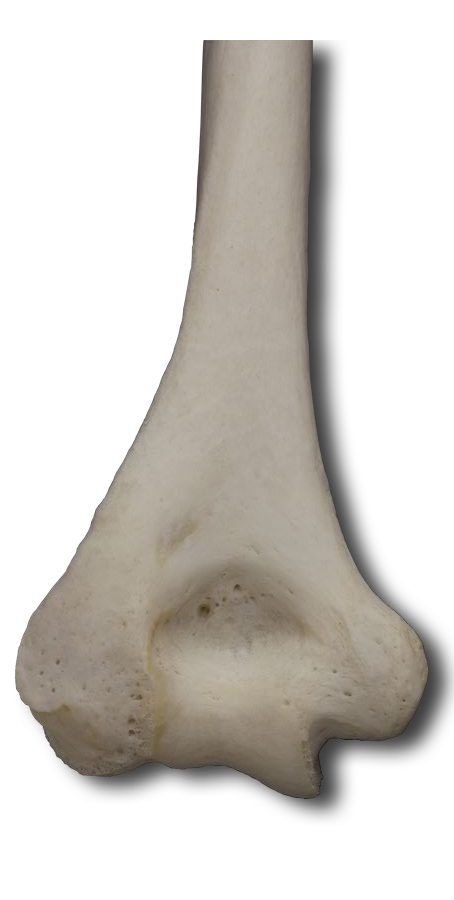
- capitulum - This rounded knob is on the lateral aspect of the distal end of the humerus. It articulates with the head of the radius to allow the elbow to bend and straighten.
- radial fossa - Your specimen's upper limbs are not in the anatomical position. Consequently, anatomical anterior is viewed by rotating your specimen 180° (flipping him over). The radial fossa is an anterior depression that receives the head of the radius when the forearm is flexed (bent).
- trochlea - Located medial to the capitulum, this spool-shaped surface articulates with the ulna.
- coronoid fossa - the anterior depression that receives the coronoid process of the ulna when the forearm is flexed
- olecranon fossa - a posterior depression that receives the olecranon of the ulna when the forearm is extended (straightened)
- medial & lateral epicondyles - rough projections on either side of the distal end where tendons attach for most forearm muscles (Again, rotate your specimen to insure you identify these structures.)
Due to mechanical necessity, the specimen’s arms had to be folded inward which puts him NOT in anatomical position. Therefore, what initially appears to be the anterior forearm is actually the posterior. As always, using your interactive image as a guide, identify the following ulnar markings on your specimen.
- olecranon - Located at the proximal end of the ulna and visible from the posterior perspective, this is the point of your elbow. It is the attachment site for muscles that move the forearm.
- coronoid process - an anterior ulnar projection that, together with the olecranon, receives the trochlea of the humerus
- ulnar tuberosity - Just inferior to the coronoid process, this ridge is the attachment site for forearm moving muscles.
- head - This distal end of the ulna is separated from the carpals (wrist bones) by a fibrocartilage disc.
- styloid process - small projection at the wrist that is an attachment point for hand tendons
Again, using your interactive image as a guide, identify the following radial markings. Rotate the specimen for best view.
- head - the disc-shaped proximal end of the radius that articulates with the capitulum of the humerus
- radial tuberosity - a roughened area along the medial side that is an attachment point for the tendon of the biceps brachii muscle
- styloid process - small projection at the wrist that is an attachment point for hand tendons
Again, since your specimen is not in the anatomical position, this anterior view of the body is actually looking at the posterior aspect of the hand. Use the rotation wheel to take a closer look at the carpals of the right hand, dragging the image to reposition the specimen as needed.
Identify the following:
Proximal row (lateral to medial)
- scaphoid - 70% of wrist fractures involve only the scaphoid since the force of the fall is passed from the hand through the capitate to the scaphoid then to the radius.
- lunate
- triquetrum
- pisiform - Zoom back out and rotate your specimen 180° so you are now looking at the anterior aspect of the hand. Use the right mouse button to drag your specimen back to center. Zoom back in to the right wrist and identify the pisiform.
Distal row (lateral to medial) - Zoom back out and rotate so you are looking at the front of your specimen but the posterior aspect of the hand. Center the right hand and zoom back in to identify these carpals.
Sally Left The Party To Take Cathy Home - That should help you remember them, eh?
Long flexor tendons of the fingers and thumb, as well as the median nerve, pass through the concave space formed by the pisiform and hamate (on the ulnar side) and the scaphoid and trapezium (on the radial side). Along with some deep fascia, this forms the carpal tunnel.
Use the zoom slider to take a closer look at the right metacarpals. Determine the number/naming system for the five metacarpals.
Locate the metacarpals on the interactive image.
Locate the phalanges on the interactive image.
Examine the phalanx bones and determine the naming system for them, too.
I hope you figured out this riddle. 1 arm bone, 2 forearm bones, 8 wrist bones, 5 hand bones, and 14 finger bones makes 30 bones in each of our upper extremities. The general pattern, proximal to distal, is "few to many."
Self-test Labeling Exercises