Facial Bones
Directions
- Print this PDF worksheet for a hardcopy guide as you work through this lesson.
- Within the lesson click the red linked headings to bring up the desired starting point within the cadaver for your work.
- Use the provided images on the worksheet to annotate and identify specific anatomical structures.
Identify the following:
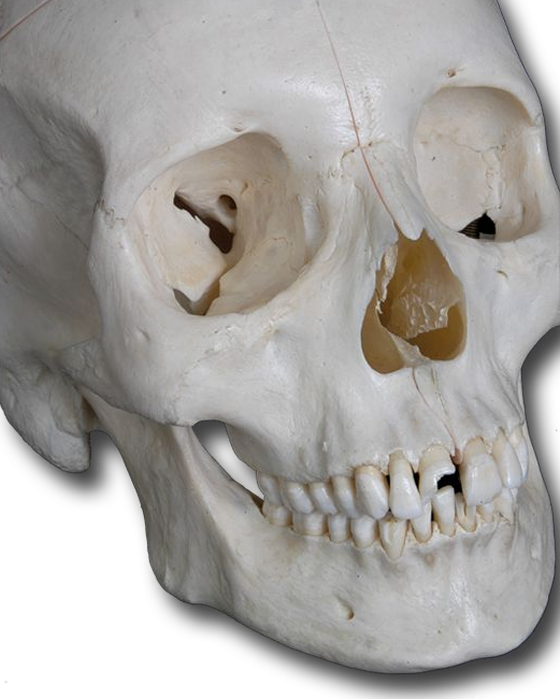
- nasal bones - This pair of bones meet at the midline and form the bridge of the nose. The remaining supporting structure of the nose is cartilage.
- maxilla - your upper jaw bone
- zygomatic bones - your cheek bones
- mandible - This is your lower jaw bone. Notice it is subdivided into 9 different sub-structures. You'll learn some of these in just a few minutes.
This bone is actually two bones (maxillae) before birth that fuse together to form the upper jaw bone. The maxilla articulates with every bone in the face except the mandible (lower jaw bone).
Using the following interactive images, identify these structures:
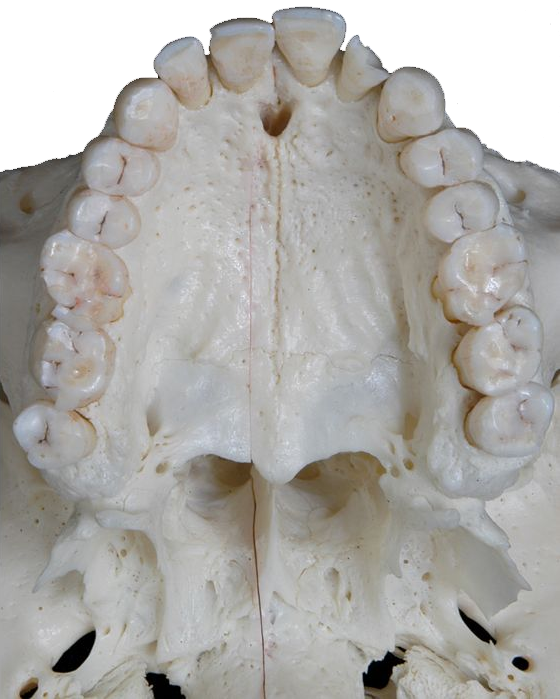
- alveolar processes - This bony ridge contains the alveoli (sockets) for the maxillary teeth (upper teeth).
- palatine process - This is a horizontal projection of the maxilla that forms the anterior part of the hard palate.
- infraorbital foramen - This opening in the maxilla is below each orbit (eye socket). A branch of the maxillary nerve passes through the floor of the orbit and this foramen to supply the skin of the cheek, nose, and upper lip.
Dissect out the maxilla and identify the following:
- lacrimal bones (right & left) - These fingernail shaped and sized bones are the smallest in the face. They form part of the lacrimal fossa, a vertical tunnel formed with the maxilla that contains the lacrimal sac. The lacrimal sac gathers tears and passes them into the nasal cavity.
- palatine bones (right & left) - These two L-shaped bones form the posterior portion of our hard palate, which separates the nasal cavity from the oral cavity.
- inferior nasal conchae (right & left) - This pair of scroll-like bones help swirl, moisten and filter air as it passes over mucous membranes before passing into the lungs.
Rotate your specimen to a right lateral view. Another helpful adjustment is to bring up the face of your specimen so you have some perspective of where you are looking. Do this using the skin slider. This slider can be used at ANY time. You can always click the red links to return to the default position.
Locate the following:
- palatine bones (right) - This orientation provides a different perspective for this bone.
- vomer - This triangular bone is part of the nasal septum, the partition that divides the nasal cavity into right and left sides.
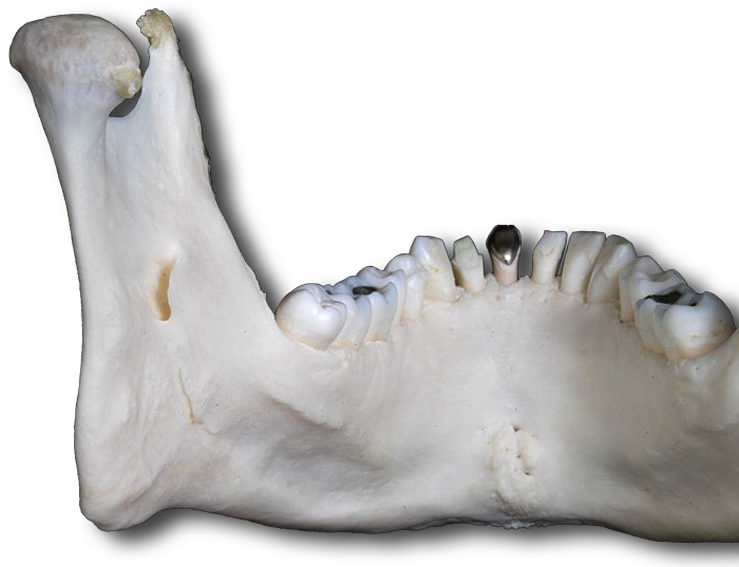
From your dissection and the following interactive image, identify the following mandibular markings on your worksheet diagrams:
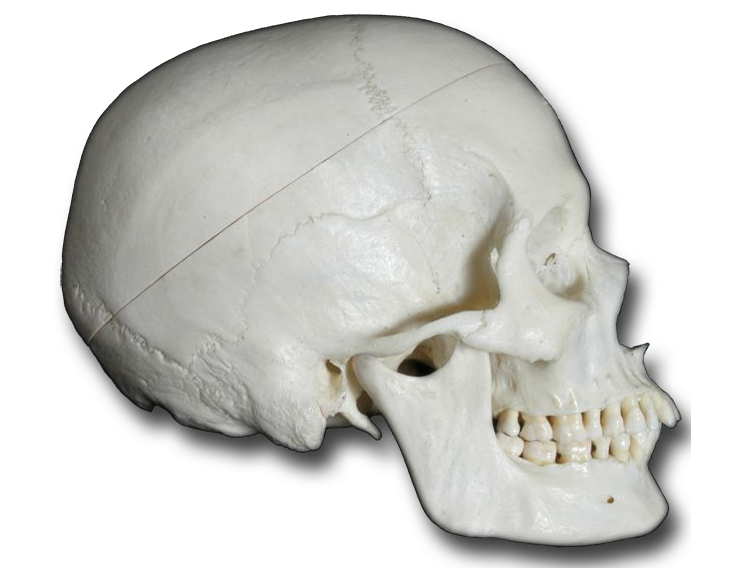
- body - the curved horizontal portion of the mandible
- ramus - the "vertical" portions of the mandible
- angle - This is the angle formed by the "horizontal" line of the inferior border of the body and the "vertical" line of the posterior border of the ramus. When someone loses consciousness, pulling the angle anteriorly can move the tongue anteriorly and increase air flow if mouth to mouth resuscitation is required.
- coronoid process - This is the mandibular projection to which the temporalis muscle attaches, which enables some mandibular movement.
- condylar process - This is the rounded posterior condyle of the ramus which articulates with the mandibular fossa and articular tubercle of the temporal bone to form a "synovial joint" (A fully movable joint in which a fluid filled synovial cavity is present between the two articulating bones).
- temporomandibular joint - As its name implies, this is the articulation between the mandible and the temporal bones (again, not specifically labeled).
- mental foramen - an opening (visible in your dissection) through which a branch of the inferior alveolar nerve passes to supply the skin of the chin and lip
- mandibular foramen - an opening in the medial side of the ramus (not visible in your dissection), through which the mandibular nerve branches to form the inferior alveolar nerve
Rotate the specimen to a lateral view.
Each orbit (eye socket) is a cone-shaped space that contains the eyeball and associated structures. Seven bones compose the orbit, three cranial and four facial. Identify these bones in their structural role within the orbit.
The ethmoid and vomer have been highlighted for you. The perpendicular plate of the ethmoid, the vomer, and hyaline septal cartilage combine to form the nasal septum, a partition dividing the nasal cavity into two parts. This increases the surface area within the nasal cavity.
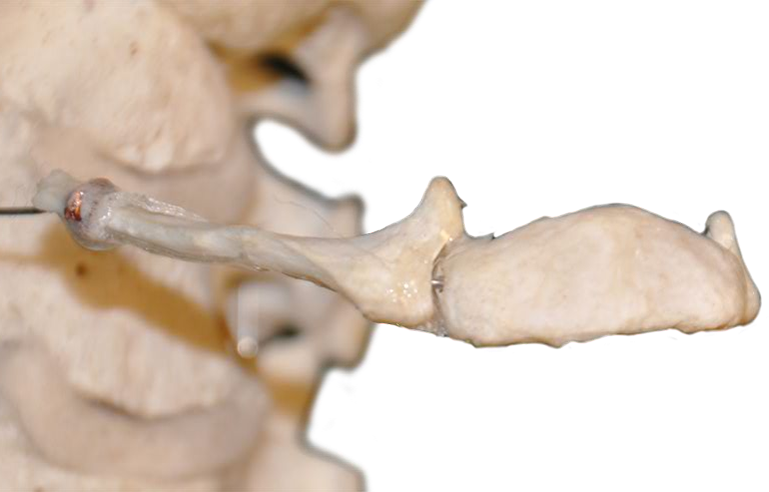
The hyoid bone is NOT a facial bone, but then again, it is unique and doesn't really fit with any of the other axial skeleton bone groups. Dissect away the mandible to reveal the hyoid. It doesn't articulate with any other bone. Instead, it is suspended by ligaments from the styloid processes of the temporal bones. The hyoid supports the tongue and provides attachment sites for some tongue muscles and for muscles of the neck and pharynx.
Manipulate your dissection to best examine the hyoid. Use the following interactive image as a guide to identify the following hyoid parts:
Self-test Labeling Exercises